Another Small Job Turns Big
The big job for the winter of 2004 was going to be replacing the
flexible bellows where the driveshaft, exhaust and shift cable go from inside
the boat out to the outdrive. (more on that later) I also had some canvas work
planned and a few minor maintenance items.
 One
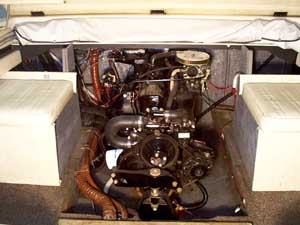
of those minor items was replacing the fan belt. Actually there's no fan. The
belt powers the alternator and the water circulating pump on the front of the
engine. Anyway, After staring at it for a while, it became clear that the only
way to get the belt off was to remove the front motor support. There's a
removable section on one side of the motor mount, but the crankshaft pulley is
too close to other parts of the mount to let the belt out through this opening.
I could have left well enough alone, but I'm certain that like many of the parts
on my old boat, the belt is the original
one that was installed at the factory in 1977. It even had "Mercury
Marine" still printed on the outside. I also wanted to put a second belt
inside the motor mount where it could serve as a ready spare that wouldn't
require major
disassembly. I figured now was a good time to do this, because I already had the
drive off and was going to have to re-align the engine anyway when I reassembled
that end of it.
One
of those minor items was replacing the fan belt. Actually there's no fan. The
belt powers the alternator and the water circulating pump on the front of the
engine. Anyway, After staring at it for a while, it became clear that the only
way to get the belt off was to remove the front motor support. There's a
removable section on one side of the motor mount, but the crankshaft pulley is
too close to other parts of the mount to let the belt out through this opening.
I could have left well enough alone, but I'm certain that like many of the parts
on my old boat, the belt is the original
one that was installed at the factory in 1977. It even had "Mercury
Marine" still printed on the outside. I also wanted to put a second belt
inside the motor mount where it could serve as a ready spare that wouldn't
require major
disassembly. I figured now was a good time to do this, because I already had the
drive off and was going to have to re-align the engine anyway when I reassembled
that end of it.
 So,
I rigged up a support for the front of the engine by removing the back seats and
putting a sturdy step ladder inside the boat with a come-along hanging from it,
hooked through the hoisting eye on the front of the engine.
So,
I rigged up a support for the front of the engine by removing the back seats and
putting a sturdy step ladder inside the boat with a come-along hanging from it,
hooked through the hoisting eye on the front of the engine.
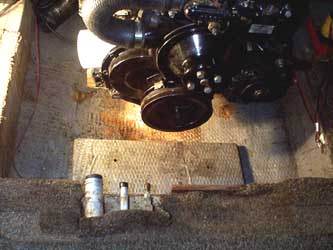
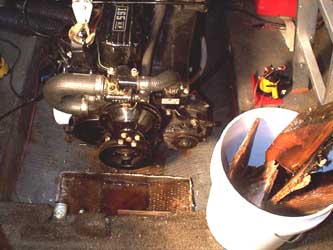
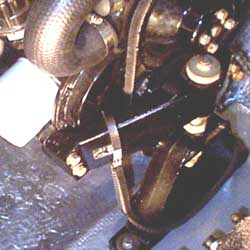
The first sign of trouble came when I tried to loosen one of the
two bolts that attach the motor mount bracket to the boat. On the first turn, it
rose a little bit and then just started turning without going anywhere. I
didn't really know what I was dealing with, whether this was a lag screw or a
bolt with a nut on the end or whatever, so I tried turning while lifting with a
screwdriver wedged underneath the bolt head. This worked a little too well, as
the fastener, which turned out to be a lag screw, pulled straight out with
little effort revealing threads full of corroded metal and rotted wood. This was
one of those things that I'm both really glad I found, and really sorry I found.
The other side was similarly bad, so I finished removing the mount and did some
probing in the mounting pad. I found soft, rotted wood all around both bolt
holes. Apparently there hadn't been much of anything securing the front of my
engine to the boat for quite some time.
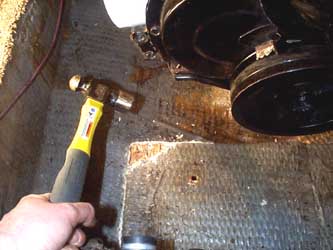
There
was nothing to do but fix it, so I put some wood blocks under the engine to
supplement my ladder hoist, and began trying to hack my way through the
fiberglass of the mounting pad. After some trial and error, I found that a small
cold chisel did a pretty good job of cutting through the fiberglass and I
proceeded to peel the top off the mounting pad. Once the fiberglass top was
removed I could see that the bad wood was mainly confined to the area around the
bolts. Apparently the screws were wicking water into the wood and feeding the little
fungi critters that make wood rot.
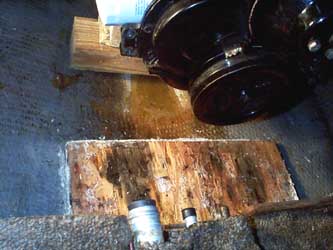
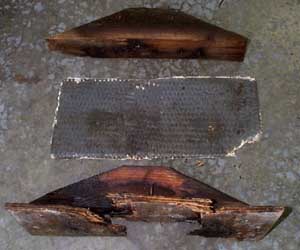
I
did some prying and found that the part I was seeing was a piece of
plywood nailed to some other boards underneath. I was able to pry the
plywood section off in several pieces and found two large V-shaped timbers cut
to fit the shape of the hull underneath. They don't appear to have ever been
attached to anything. It looks like they just assembled the wood pieces and put
a single layer of heavy fiberglass over top to hold it in place. the wood didn't
fill the entire cavity and there was a fair amount of water in the bottom.
Curiously, the bottom of the large timbers which had been sitting in a pool of
water for 27 years didn't show any signs of rot. They had bad places in their
tops, where the lag screws came through, though.
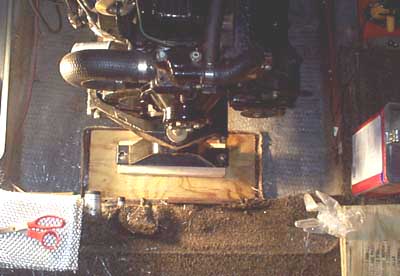
After a thorough cleaning to remove the oil and dirt, I
purchased some resin and glass cloth from the marina, bought a sheet of
1/2" pressure treated plywood from Lowe's, and set about creating a new
mount. I spoke to several people who recommended epoxy resin for the repair, but
all the guys at the local shops recommended polyester, so that's what I used. I cut several pieces of plywood to
the appropriate sizes to make a stacked sandwich in the shape
of the original mount and put a layer of resin and cloth between each. Below you
can see the first several layers in place. I temporarily put the motor support
back on so that I could use the weight of the engine to clamp the parts down
while the resin cured. This also helped assure that the support would rest level
on the finished surface.
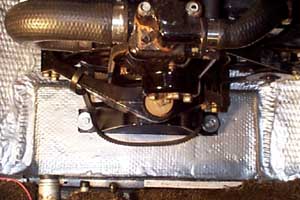
After all the wood was in place, I topped the whole thing with a
heavy layer of woven roving like the original. I thought the paint that I bought
would be closer to the dull grey of the original, but it turned out to be a lot
shinier. Kind of brightens up the bilge.
Now that I had that little task out of the way, I finished the job of
replacing the belt. As a precaution, I put an extra belt inside the motor mount
and fastened it out of the way so that the next replacement would go a little
easier.
Next: Doctoring the Bellows
Index