A New Canvas Cover
 On
the back of my boat is a vinyl covered wooden piece that hinges up and let's you
remove the big cover from the engine. I knew the hinged piece was in need of
some repair, so I took some of the vinyl off of it to try to see what kind of
shape it was in. It turns out it was more rotted than not, so the next order of
business was to replace it.
On
the back of my boat is a vinyl covered wooden piece that hinges up and let's you
remove the big cover from the engine. I knew the hinged piece was in need of
some repair, so I took some of the vinyl off of it to try to see what kind of
shape it was in. It turns out it was more rotted than not, so the next order of
business was to replace it.
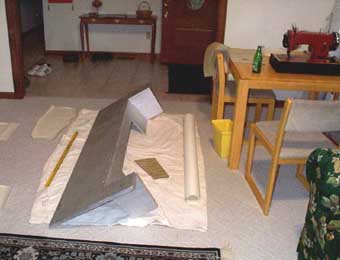
The original was one layer of 3/4" plywood with some strips
of 3/8" plywood around the edges. I made my new one from two layers of
1/2" pressure treated plywood, using the remainder of the sheet I'd bought
for the motor mount repairs. I covered it with beige
naughahyde with a layer of batting over the top in place of the thin foam of the
original. The beige naughahyde that I got from Sailrite
looks very white next to the weathered material of
the original upholstery. (Eventually, if I keep this boat long enough, I may
reupholster enough pieces to make it all match.)
Not wanting to deal with more rotted wood next winter, I decided
to make a whole-boat cover to keep the rain out when the boat is sitting at the
dock. The running covers that came with the boat, including the new
one I made for the front, will keep you mostly dry if you're caught out in
the rain, but still allow a certain amount of water to get into the boat through
various zippers and especially around the walk-through opening in the
windshield. The result is that the interior of the boat stays warm and damp all
summer long, and that's the recipe for wood rot.
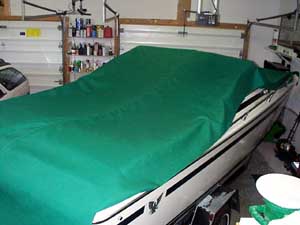 The
first thing to do was make a piece of fabric big enough to cover the boat. I
took two long pieces of 46" wide Sunbrella canvas and put them together
with a flat felled seam to make one big twenty foot long by seven and a half
foot wide piece.
The
first thing to do was make a piece of fabric big enough to cover the boat. I
took two long pieces of 46" wide Sunbrella canvas and put them together
with a flat felled seam to make one big twenty foot long by seven and a half
foot wide piece.
Next I put my big hunk of canvas on the boat and started fitting
it up and attaching it with my temporary "quick fit" snaps.
After a lot of fitting and trimming and sewing in darts at the
corners and at the peak of the windshield, I had a pretty good fit.
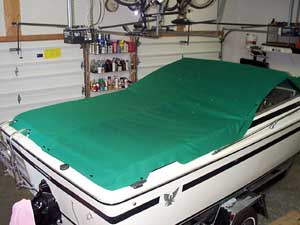 I
cut out some fabric for reinforcing pieces to put around the edges where the
snaps would go and sewed those into place. I also put a reinforcing strip across
the cover where it goes over the windshield. It was very difficult to put that
center piece on straight, and there are still some little puckers in the fabric
where I didn't get it quite right.
I
cut out some fabric for reinforcing pieces to put around the edges where the
snaps would go and sewed those into place. I also put a reinforcing strip across
the cover where it goes over the windshield. It was very difficult to put that
center piece on straight, and there are still some little puckers in the fabric
where I didn't get it quite right.
After all the reinforcements were sewn on, I fitted the cover on
the boat again and trimmed all the edges down to their final sizes. With the
cover all trimmed up, I finished the edges with a strip of three quarter inch
binding tape. This time, I bought the binding attachment for my sewing machine
from Sailrite. Sewing on binding with the
attachment is almost too easy. It guides the tape into the machine and folds it
over just in front of the needle so that all you have to do is feed fabric into
the fold and sew.
 I had a problem with the sewing machine's feed mechanism toward
the end of the binding. After a conversation with Matt Grant of Sailrite, we
determined that the cam that lifts the walking foot had slipped on its shaft, so
I loosened a set screw, rotated the cam to the correct position, tightened it
back down, and I was back in business.
I had a problem with the sewing machine's feed mechanism toward
the end of the binding. After a conversation with Matt Grant of Sailrite, we
determined that the cam that lifts the walking foot had slipped on its shaft, so
I loosened a set screw, rotated the cam to the correct position, tightened it
back down, and I was back in business.
With
the edge binding attached, I
did one more fitting with the quick fit snaps and marked all the snap locations,
then took the cover off and put the real snaps on.
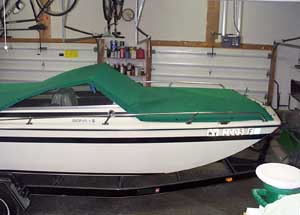
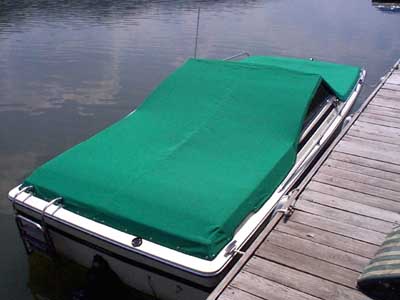
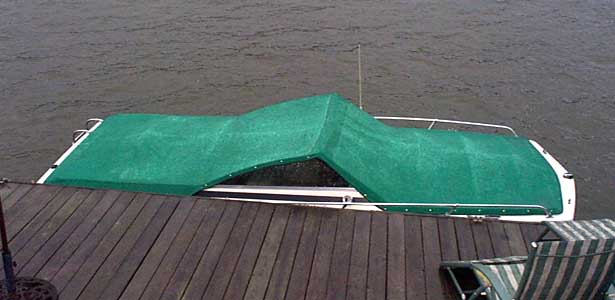
The barge-like shape of my boat leaves large flat surfaces at
both the front and rear of the cover. Without some kind of support under these
flat spots, water will pool there and the cover will become a big bag of water.
Covers like this typically have support poles under their flat areas so that the
fabric remains taut and water runs off instead of pooling.
I made a couple of pillowy things to cushion the ends of the two
cover support poles that I had from the boat's original cover, but I wasn't
entirely satisfied with this arrangement, so I replaced the poles with battens, which are strips of wood that you stick into
fittings at the sides and that bow up and hold the cover taut so that water
doesn't find a low spot and pool. With the battens, it doesn't have the circus
tent appearance that it had with the poles.

With the cover finished, Laura and I spent a day cleaning,
polishing and waxing the boat, prior to this summer's first launch. The
horizontal fiberglass surfaces had developed a chalky appearance from exposure
to the sun, but some Meguiar's color restorer and a lot of hard work followed by
some Meguiar's boat and RV wax brought back the shine.
I was a little tentative about launching the boat, since I'd
done all that work on various openings in the transom
over the winter, so I opened up the motor cover while it in the water and still
on the trailer so I could check for leaks. I doubt this won me any friends at
the public ramp, but it was only for a minute and nobody said or did anything to
indicate they were getting impatient. There were no leaks, and things seem just
a little smoother and less rumbly now, probably due mostly to the new gimbal bearing.
Next: Unlucky Break
Index